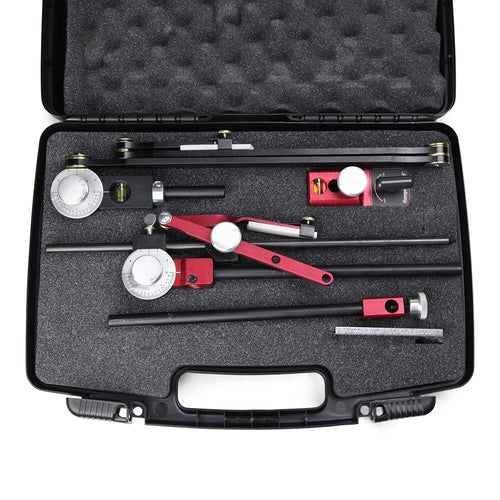
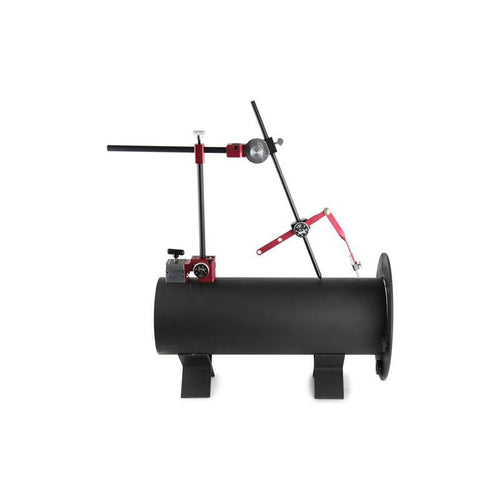
Multi-Hole Imager

$ 271.75
SKU
//
MHI515
Product Overview
Multi-Hole Imager MHI515 - Flange Wizard Tools
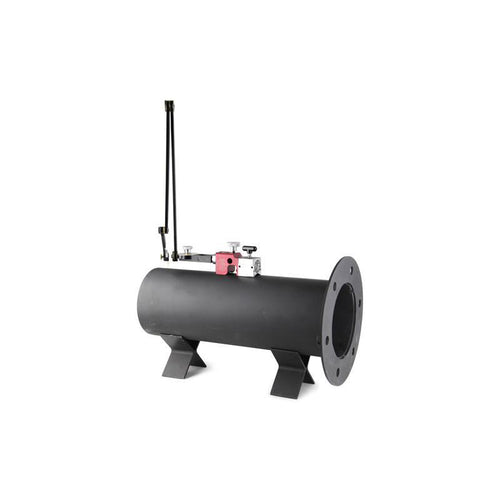
The Multi-Hole Imager will layout round or elongated holes (ellipse) on flat material or pipe to match laterals at compound angles or at 90°.
Learn How to Use the Multi Hole Imager
Featuring a New On/Off Switchable Magnet
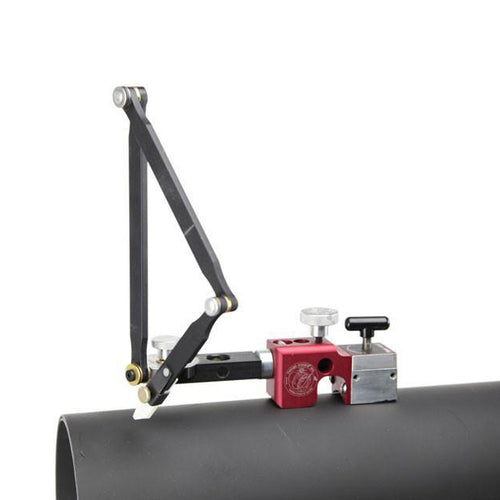
- The strong "on and off" magnet in the base makes positioning on a round, flat, or irregular surface easy.
- A "bull's eye" circular leveling vial is built in the main tower of the Multi-Hole Imager to assist in leveling the tool as required.
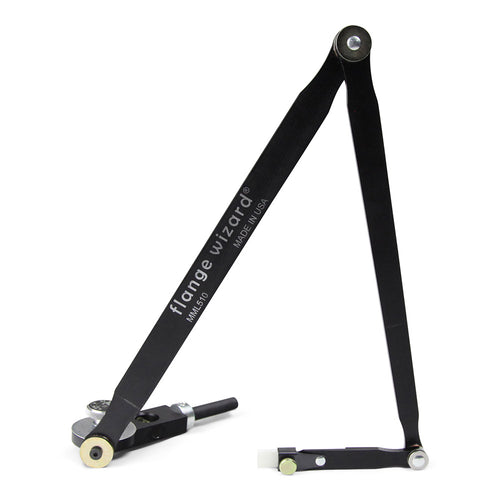
- The main arm is adjustable and notched to keep it centered with the tower for true layouts.
- A protractor, with adjustable shaft and sliding marking arm, fits in the main arm of the Imager allowing for layout of elliptical holes in header pipe for matching compound pipe laterals coming in to the header.
- It will layout matching holes in pipe for 90° saddle branches.
- The Imager is great for round holes in plate or elongated holes when coming in at an angle.
- It also can replace multiple templates with just one tool.
- The Multi-Hole Imager is sold in a sturdy polypropylene case for protection between jobs.
- A Spring Buckle Strap (p/n 5010) is available to hold Imager in position for non-magnetic surfaces.
- Marks 3/4" to 20" holes in plate with vertical shaft at 90°.
- Marks 3/4" to 16" saddle holes in pipe with vertical shaft at 90°.
- The Multi-Hole Imager has a 150 pound holding magnet with a "on and off" switch at the base.
Frequently Asked Questions
- Question:
- Will this tool work on pipe as well as flat material?
- Answer:
- Yes! The hole imager will layout round and elongated holes on flat material and pipe to match laterals at compound angles or at 90°.
- Question:
- Is it hard to set up for marking?
- Answer:
- No! Place the point of the round shaft in your center punched hole location center at whatever angle you need. Level up the main tower by centering the vials on the main body and tower. Set the radius of hole needed from shaft point to marking device. Lock tool in place by setting magnetic base in the "on" position. Always let the sliding arm mark from highest position to lowest point of work surface.